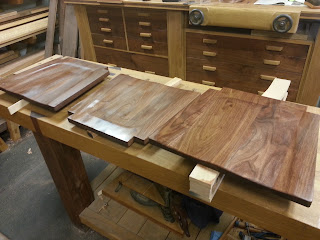
Down to bidness. Here's the steps I used for the sculpted seats.
Using the chair as a pattern:
Then I edge glued my blanks.
Transferred the pattern and cut them out on the bandsaw.
I adapted the pattern to outline the recess.
Actually this is the first time I've made sculpted seats. I've seen it done different ways, and I just figured I'd try some different methods.
Anyway, I made another line a couple inches in, and freehand routed a flat recess with a straight bit. Be sure to start and work out, otherwise you'll run out of flat area for your router. This gave me a nice, uniform area to blend to the edges.
Then some power carving. The gold bugger I tried is a carbide wheel from Harbor Freight. It was a bit too flat for this task. Next time I'll spring for the Kutzall brand. They are more dish shaped.
I then put a 60 grit wheel on the angle grinder. Worked ok. Just tried to blend the surfaces.
There are scorps and various hand tools for this task. I might pick up one if I keep making chairs. I do have a curved spokeshave, That got me started toward smooth.
Then the venerable card scraper.
Smoothing plane for the perimeter, and more scraping.
Plane on the edges true and smooth.
Final fit and cutting notches for the rear legs. Don't forget to leave room for seasonal movement. You don't want the seat spreading the rear legs.
 |
| It's missing a back because it's a captain's chair. You'll see. |
I avoid power sanding as much as possible, but did run 220 grit over each of the seats for uniformity.
Then some danish oil made them dance.


